
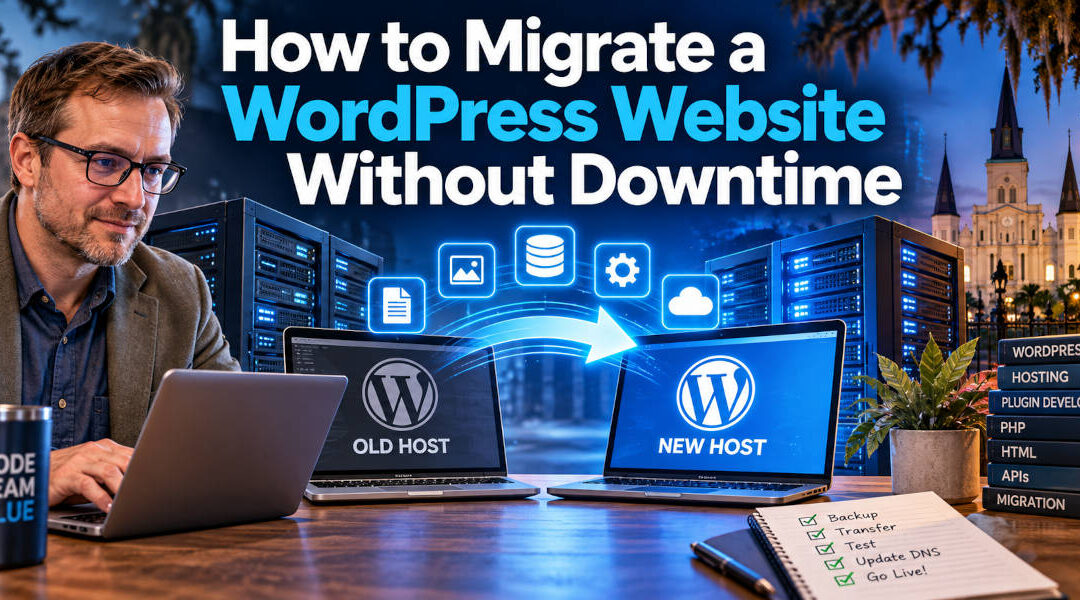
Moving a WordPress website from one hosting provider to another sounds simple: copy the files, move the database, point the domain name to the new server, and you’re finished.
In practice, a WordPress migration can involve considerably more.
A modern WordPress website may include thousands of files, a large database, email configuration, SSL certificates, DNS records, caching systems, security software, scheduled tasks, custom plugins, third-party APIs, payment gateways, and other services that all need to continue working after the move.
A poorly planned migration can result in website downtime, missing images, broken links, lost form submissions, database errors, email problems, or even lost customer orders.
The good news is that most WordPress websites can be moved between hosting providers with little or no noticeable downtime when the migration is carefully planned.
In this guide, we’ll explain how to migrate a WordPress website without downtime, how DNS affects the migration process, what to test before switching servers, and how to handle more complicated WordPress websites.
What Is a WordPress Website Migration?
A WordPress migration is the process of moving a WordPress installation from one hosting environment to another.
A complete WordPress website normally consists of two major components:
- WordPress files
- A MySQL or MariaDB database
The files include WordPress itself, themes, plugins, uploaded images, documents, JavaScript, CSS, and other assets.
The database stores most of the website’s actual content and configuration, including:
- Pages
- Blog posts
- Users
- Comments
- WordPress settings
- Plugin settings
- Navigation menus
- Custom fields
- Form configuration
- WooCommerce information
- Custom post types
A proper migration needs to move both the files and the database while preserving the relationship between them.
WordPress provides its own documentation covering the basics of moving a WordPress installation.
Can You Really Migrate WordPress Without Downtime?
In many cases, yes.
The key is to completely prepare and test the website on the new server before changing the DNS records that send visitors to it.
The general process looks like this:
- Keep the existing website running normally.
- Create the new hosting environment.
- Copy the WordPress files and database to the new server.
- Configure the new server.
- Test the migrated website before changing DNS.
- Synchronize any last-minute changes if necessary.
- Point the domain to the new server.
- Keep the old server running during the transition.
- Monitor the new website after launch.
- Remove the old hosting account only after the migration is confirmed successful.
At no point does the existing website have to be intentionally taken offline for a normal informational or business website.
This is one of the advantages of properly managed WordPress web hosting. A hosting migration should be treated as a controlled deployment rather than simply copying files and hoping everything works.
Step 1: Audit the Existing WordPress Website
Before moving anything, take inventory of the existing website.
You need to understand what you are moving.
Start by documenting:
- Current hosting provider
- WordPress version
- PHP version
- MySQL or MariaDB version
- Active theme
- Child theme
- Active plugins
- Custom plugins
- Custom PHP code
- Database size
- Uploads directory size
- SSL configuration
- DNS provider
- CDN configuration
- Email configuration
- Scheduled tasks or cron jobs
- Third-party API integrations
- Payment gateways
- Forms
- SMTP configuration
- Analytics and tracking scripts
This is particularly important for websites that have been running for many years.
Older WordPress websites often contain custom code or plugins that were designed for older versions of PHP. Moving the website to a modern hosting environment can expose compatibility problems that were not apparent on the old server.
These problems should be identified before DNS is changed.
Step 2: Make a Complete Backup
Never begin a WordPress migration without a complete backup.
The backup should include both the database and all WordPress files.
At minimum, preserve:
- WordPress core files
/wp-content/- Themes
- Plugins
- Uploads
.htaccesswp-config.php- Complete database export
For a straightforward migration, a WordPress backup or migration plugin may be sufficient.
For larger or more complicated websites, we generally prefer having access to the actual website files and a direct database export in addition to any plugin-generated backup.
That gives you another recovery option if the automated migration process fails.
Step 3: Prepare the New Hosting Environment
Set up the new server before touching the existing website.
The new environment should be configured to support the current website.
Important settings include:
- PHP version
- PHP memory limit
- Maximum upload size
- Execution time
- Database configuration
- HTTPS/SSL
- Server caching
- File permissions
- Rewrite rules
You should also confirm that any required PHP extensions are installed.
A website may rely on extensions for image processing, encryption, XML, database connectivity, ZIP archives, or other functionality.
This is one reason that moving an older website to a substantially newer server should be tested carefully.
The migration and the server upgrade may effectively become two separate projects.
Step 4: Copy the WordPress Files
The next step is transferring the WordPress files to the new server.
Depending on the size of the website and your hosting environment, files can be moved using:
- SFTP
- SSH
- rsync
- Hosting migration tools
- Backup plugins
- WordPress migration plugins
- Server-level backup and restore systems
Large websites may contain tens or hundreds of thousands of media files.
For these websites, a server-to-server transfer can be much faster than downloading the entire website to a local computer and uploading it again.
The important thing is to confirm that all files arrive on the new server.
Pay particular attention to the /wp-content/uploads/ directory because missing media files may not become obvious until you begin testing individual pages.
Step 5: Migrate the WordPress Database
The database can normally be exported from the existing server and imported into the new database server.
Common tools include:
- phpMyAdmin
- MySQL command line
- WP-CLI
- Hosting control panels
- Migration plugins
After importing the database, update wp-config.php with the database credentials for the new server if necessary.
These include:
define( 'DB_NAME', 'database_name' );
define( 'DB_USER', 'database_user' );
define( 'DB_PASSWORD', 'database_password' );
define( 'DB_HOST', 'localhost' );
The exact values depend on the new hosting environment.
Step 6: Test the New Website Before Changing DNS
This is probably the most important step in a zero-downtime WordPress migration.
Do not point your domain at the new server and then start testing.
Test first.
There are several ways to preview a website on its new server before changing public DNS.
Some hosting providers provide a temporary domain or staging URL.
Another option is modifying the local hosts file on your computer so that your computer resolves the domain name to the new server’s IP address while everyone else continues visiting the old server.
For example, your hosts file might temporarily contain something similar to:
192.0.2.100 example.com
192.0.2.100 www.example.com
Your browser will then load example.com from the new server while regular visitors continue using the old server.
This makes it possible to test the website using its actual domain name before making the DNS switch.
What Should You Test Before the Migration?
Don’t just load the homepage and assume the migration worked.
Test the major components of the website.
Pages and Blog Posts
Open a variety of pages and posts.
Check:
- Images
- Layouts
- Navigation
- Sidebars
- Footers
- Embedded media
- Downloads
- Internal links
WordPress Administration
Log into /wp-admin/ and confirm that you can:
- Edit pages
- Edit posts
- Upload media
- Update settings
- Access plugin interfaces
Contact Forms
Submit every important contact form.
Confirm that:
- The form submits successfully.
- The information is stored correctly if applicable.
- Notification emails are delivered.
- Confirmation emails reach the visitor.
Email problems are one of the most common issues discovered after moving a WordPress website.
Search Functionality
Test the website’s internal search if it has one.
Ecommerce
For WooCommerce websites, perform test transactions and review:
- Cart functionality
- Checkout
- Payment gateway communication
- Taxes
- Shipping
- Order confirmation
- Customer email
- Administrative email
- Customer account functionality
Moving an ecommerce website requires additional planning because orders can continue arriving while the migration is taking place.
User Logins
For membership websites, customer portals, or private websites, verify login and logout functionality.
Custom Plugins
Websites with custom functionality require additional testing.
A custom WordPress plugin may interact with APIs, external databases, server directories, scheduled tasks, or PHP extensions that behave differently on the new hosting platform.
Testing these integrations before changing DNS can prevent a seemingly simple hosting migration from unexpectedly breaking an important business process.
Step 7: Check for Hard-Coded URLs and Server Paths
Some WordPress themes and plugins store complete URLs in the database.
For example:
https://example.com/wp-content/uploads/image.jpgIf the domain name is staying exactly the same, these URLs usually do not need to be changed.
However, problems can arise when moving between:
http://example.comand:
https://example.comor between:
www.example.comand:
example.comIf the domain itself is changing, URL replacement becomes much more important.
Do not perform a simple SQL find-and-replace against the WordPress database unless you understand PHP serialized data.
Some WordPress settings store serialized values, and changing the length of a URL incorrectly can corrupt those values.
WP-CLI provides a search-replace command that understands serialized WordPress data. The official documentation is available at WordPress WP-CLI Search-Replace. WordPress Developer Resources
An example might look like:
wp search-replace 'https://oldsite.com' 'https://newsite.com' --all-tablesAlways back up the database before performing a large search-and-replace operation.
Step 8: Lower the DNS TTL Before the Migration
DNS determines which server receives visitors requesting your domain name.
DNS records have a TTL, or Time to Live, which tells DNS resolvers approximately how long they can cache a record before checking for an updated value.
If possible, lower the TTL before the migration.
For example, you might reduce the TTL to 300 seconds several hours or a day before the move.
This can help DNS changes begin taking effect more quickly when you eventually point the domain to the new server.
Do this ahead of time. Lowering the TTL immediately before changing the IP address doesn’t necessarily help visitors whose DNS resolver has already cached the older, longer TTL.
Step 9: Handle Dynamic Websites Carefully
A basic company website is relatively easy to migrate without downtime because the database may change only when someone edits a page or submits a contact form.
Dynamic websites are different.
Examples include:
- WooCommerce stores
- Membership websites
- Forums
- Online communities
- Reservation systems
- Learning management systems
- Customer portals
- High-volume lead generation websites
Imagine copying a WooCommerce database at 10:00 a.m.
Between 10:00 a.m. and the DNS switch at noon, the old website receives six orders.
If you switch to the database copied at 10:00 a.m., those six orders will not exist on the new server.
This is not really downtime, but it is potentially much worse: lost data.
For websites with continuously changing databases, you need a final synchronization strategy.
That could involve:
- Synchronizing changed database information.
- Temporarily disabling transactions.
- Putting only the dynamic portions of the site into read-only mode.
- Performing a final database transfer immediately before DNS changes.
- Using hosting infrastructure capable of database replication.
In some situations, a very short controlled maintenance period is safer than attempting literal zero downtime and risking lost orders or customer information.
The real goal should be zero disruption and zero lost data, not simply being able to say the website was never technically unavailable.
Step 10: Update DNS
Once the new website has been thoroughly tested, it is time to switch traffic.
Depending on your configuration, this commonly involves changing:
- A records
- AAAA records
- CNAME records
- Nameservers
If you’re simply moving the website while leaving DNS management with the same provider, changing the site’s A record is often easier and less risky than changing nameservers.
This is especially important when the domain also handles email.
Changing nameservers without recreating all existing DNS records can break:
- Email delivery
- Microsoft 365
- Google Workspace
- SPF
- DKIM
- DMARC
- Subdomains
- Verification records
- API services
Before changing nameservers, make sure you have a complete copy of the existing DNS zone.
Step 11: Keep the Old Hosting Account Running
Do not cancel the old hosting account as soon as you change DNS.
Keep both servers operating during the transition.
Some visitors may temporarily continue reaching the old server because of cached DNS information.
As long as both websites remain operational, visitors can continue using the site regardless of which server their request reaches.
For many migrations, we prefer leaving the old hosting account online for at least several days after confirming the new environment is working properly.
For important business websites, keeping it available somewhat longer can provide an additional rollback option.
Step 12: Install and Verify SSL
The new server needs a working SSL certificate.
Your website should properly load at:
https://example.comand, if you use it:
https://www.example.comTest both versions.
Verify that:
- The certificate is valid.
- HTTPS redirects work.
- HTTP redirects to HTTPS.
- The preferred www or non-www version is consistent.
- There are no mixed-content warnings.
SSL should ideally be configured and tested on the new server before the final DNS cutover.
Step 13: Clear Every Layer of Cache
Modern WordPress websites may have several different caching systems operating simultaneously.
These can include:
- Browser caching
- WordPress caching plugins
- Server-side page caching
- Object caching
- Redis
- CDN caching
- Cloudflare
- Managed hosting caches
After migration, clear the relevant caches.
Otherwise, you can spend an hour troubleshooting a problem that doesn’t actually exist because your browser or CDN is showing an old version of the website.
Step 14: Check Permalinks
After the migration, log into WordPress and visit:
Settings > Permalinks
Verify the current permalink structure.
If you’re using Apache and encounter unexpected 404 errors, saving the permalink settings can regenerate WordPress rewrite rules.
Also verify that the .htaccess file was transferred correctly if the website uses one.
Step 15: Check WordPress Cron Jobs
WordPress uses WP-Cron for scheduled tasks.
Plugins may rely on scheduled events for:
- Backups
- Data imports
- API synchronization
- Scheduled posts
- Subscription processing
- Cleanup jobs
- Reports
Some hosting environments disable normal WP-Cron and replace it with a server-level cron job.
If the previous host used a special configuration, you may need to recreate it on the new server.
This is particularly important for websites with custom software integrations.
Step 16: Test Email Again After DNS Changes
Even if email worked during your preliminary testing, test it again after launch.
Submit:
- Contact forms
- Password resets
- WooCommerce emails
- Administrative notifications
- Customer confirmations
Check both successful delivery and the From address being used.
We generally prefer transactional WordPress email to be delivered through a proper SMTP or email delivery service instead of relying entirely on the server’s default PHP mail configuration.
Step 17: Monitor the Website After Launch
A migration isn’t finished the moment DNS changes.
Monitor the website for the next several hours and days.
Check:
- Server error logs
- PHP errors
- 404 errors
- Form submissions
- Website traffic
- Application performance
- API errors
- Payment transactions
- Email delivery
- CPU usage
- Memory usage
- Database performance
Ask clients or employees who regularly use the website to report anything unusual.
They may use sections of the site that developers rarely visit.
WordPress Migration Plugins Versus Manual Migration
There are excellent WordPress migration plugins available, and for many websites they work very well.
Migration plugins can automate:
- Database export
- File transfers
- URL replacement
- Database imports
- Configuration changes
For a relatively straightforward WordPress website, this can make migration significantly easier.
However, automated migration tools don’t eliminate the need for testing.
A complicated website may still contain:
- Custom server configuration
- Custom plugins
- API connections
- Hard-coded file paths
- Large databases
- Scheduled tasks
- External storage
- Custom database tables
- Unusual security settings
The more customized the website becomes, the more important it is to understand what the migration software is actually doing.
Migrating a WordPress Website With Custom Plugins
Custom WordPress plugins deserve special attention during a hosting migration.
A custom plugin may contain code that depends on:
- A particular version of PHP
- A server directory
- A remote API
- A local executable
- A PHP extension
- An IP whitelist
- A scheduled task
- Custom database tables
- Environment variables
- Server-specific configuration
If the plugin communicates with an external API that whitelists your current server’s IP address, moving to a new server could cause the integration to stop working immediately.
The plugin itself hasn’t changed. The server environment has.
Businesses running important custom functionality should have their WordPress plugin development work reviewed as part of the migration process, particularly when moving between substantially different hosting platforms.
What About Website SEO During a Migration?
If the domain name and URLs remain unchanged, a hosting migration should normally have little effect on SEO when performed correctly.
The biggest SEO risks are usually accidental technical problems, such as:
- Blocking search engines on the new site.
- Leaving
noindexenabled after using a staging environment. - Broken internal links.
- Missing pages.
- Incorrect redirects.
- Slow server performance.
- SSL problems.
- Missing images.
- Changing URL structures unnecessarily.
- Returning 404 or 500 errors.
Before and after migration, verify your robots.txt file and check that:
Settings > Reading > Discourage search engines from indexing this site
is not accidentally enabled on the production website.
A staging copy should generally be prevented from appearing in search engines, but those restrictions need to be removed when that environment becomes the production website.
Should You Change Hosting and Redesign the Website at the Same Time?
Usually, we prefer separating these projects when practical.
Moving hosting already changes one major component of the website.
Redesigning the website simultaneously introduces changes to:
- WordPress
- Theme
- Plugins
- Content
- URLs
- CSS
- JavaScript
- Database
- Hosting
If something breaks, determining which change caused the problem becomes much harder.
A lower-risk approach is often:
- Migrate the existing website.
- Confirm that everything works.
- Establish a backup.
- Begin the redesign or software upgrade separately.
There are exceptions, particularly when an old website cannot run on the new hosting infrastructure, but limiting the number of simultaneous changes makes troubleshooting considerably easier.
Common WordPress Migration Mistakes
Many migration problems are preventable.
Some of the most common mistakes include:
Changing DNS Before Testing
This turns your customers into your quality assurance department.
Build and test the new environment first.
Forgetting About Email DNS Records
A website migration should not accidentally take the company’s email offline.
Document DNS before making changes.
Canceling the Old Hosting Too Soon
Keep the original environment available until you’re confident the migration has succeeded.
Forgetting the Database
Copying /wp-content/ is not the same thing as migrating WordPress.
The database contains much of the website.
Ignoring Dynamic Data
Orders, accounts, comments, form submissions, and other database activity can occur while the website is being transferred.
Plan for it.
Forgetting Custom Plugins
A plugin may depend on server configuration that doesn’t exist on the new host.
Not Testing Forms
A website can appear completely normal while its contact forms silently fail to deliver email.
Using a Blind Database Search and Replace
Serialized WordPress data can be damaged by an inappropriate database replacement procedure. WordPress’s WP-CLI search-replace command is designed to handle serialized data safely. WordPress Developer Resources
A WordPress Migration Checklist
Before changing DNS:
- Create a complete backup.
- Document the current DNS zone.
- Prepare the new hosting environment.
- Transfer files.
- Transfer the database.
- Configure WordPress.
- Install SSL.
- Preview the new website.
- Test pages and posts.
- Test forms.
- Test email.
- Test user accounts.
- Test ecommerce.
- Test custom plugins.
- Test APIs.
- Check server logs.
- Verify redirects.
- Verify robots.txt.
- Verify indexing settings.
- Plan the final database synchronization.
- Reduce DNS TTL ahead of time when appropriate.
After changing DNS:
- Confirm the domain reaches the new server.
- Confirm SSL.
- Clear caches.
- Test forms again.
- Test transactions.
- Test email.
- Review logs.
- Check scheduled jobs.
- Check analytics.
- Confirm search engines aren’t blocked.
- Keep the old server online temporarily.
- Create a fresh backup of the new production website.
How Long Does a WordPress Migration Take?
A small business WordPress website can sometimes be migrated in a few hours.
Larger or more complicated websites may require considerably longer because most of the work isn’t actually copying files.
The time is spent preparing, testing, troubleshooting, and verifying the website.
Factors that can increase migration time include:
- Large media libraries
- Large databases
- WooCommerce
- Membership functionality
- Custom plugins
- API integrations
- Legacy PHP code
- Multiple domains
- Multisite WordPress installations
- Complex DNS
- Email hosted on the same server
- Server-level caching
- CDN integration
- Security restrictions
A migration should be judged by whether the website works correctly afterward, not by how quickly someone can copy the files.
Is Moving to Better WordPress Hosting Worth It?
If your current server is slow, unreliable, difficult to manage, or no longer appropriate for the website, moving can absolutely be worthwhile.
A better hosting environment can provide improvements in areas such as:
- Performance
- Backups
- Security
- PHP compatibility
- SSL management
- Development tools
- Staging environments
- Server monitoring
- Technical support
However, hosting alone cannot correct poorly written plugins, oversized databases, inefficient code, or badly optimized themes.
Hosting and application performance should be evaluated together.
Code Team Blue provides WordPress hosting and technical support for businesses that need assistance moving, maintaining, or troubleshooting WordPress websites.
Final Thoughts: Plan First, Switch DNS Last
The safest way to migrate a WordPress website without downtime is surprisingly simple in concept:
Build the new environment while the old website remains online, completely test the new environment, and switch traffic only when the new website is ready.
The complexity comes from understanding all of the systems connected to WordPress.
A basic brochure website may involve only files and a database.
A business-critical WordPress installation may involve custom software, APIs, ecommerce transactions, cloud services, email delivery, scheduled processes, security systems, and outside vendors.
Those dependencies need to be identified before the migration begins.
With good planning, backups, pre-launch testing, and a controlled DNS cutover, most WordPress websites can be moved between hosting environments with no noticeable interruption for visitors.
Need Help Migrating a WordPress Website?
Code Team Blue provides WordPress development, hosting, custom plugin development, website migrations, API integrations, troubleshooting, and ongoing technical support.
We can help businesses migrate existing WordPress websites to new hosting environments while preserving their content, functionality, URLs, and existing integrations.
For websites with specialized functionality, our team can also evaluate and troubleshoot custom WordPress plugins, API connections, legacy PHP code, database integrations, and other components that may require additional attention during a server migration.
If you’re moving away from an existing hosting provider, upgrading an older WordPress installation, or simply looking for a more manageable hosting environment, Code Team Blue can help plan and perform the migration while minimizing disruption to your customers and employees.
Our services include:
- WordPress website migrations
- WordPress hosting
- Custom WordPress development
- WordPress plugin development
- PHP development
- Database migration
- API integration
- SSL configuration
- DNS configuration
- WordPress troubleshooting
- Legacy WordPress upgrades
- Website performance optimization
- Backup and recovery
- Ongoing WordPress support
Contact Code Team Blue today if you need help migrating a WordPress website or moving an existing site to a new hosting platform.

Visit CodeTeamBlue.com to learn more about our WordPress development, custom software, mobile application, hosting, and technical support services.